In the ever-evolving world of web development, Next.js has emerged as a powerful framework to create efficient and scalable applications. Developers are increasingly turning to Next.js to build robust web solutions, making it essential to understand how to create a Next.js app from scratch. This guide aims to provide a comprehensive walkthrough for beginners and experienced developers alike, covering everything from setting up a project to deploying the finished application.

This tutorial will take readers through the process of creating a Next.js app step by step. It will cover the basics of getting started with Next.js, setting up a new project, and building the first page. The guide will also delve into styling techniques, working with data, and ultimately deploying the application. By the end, readers will have a solid foundation to build upon and will be well-equipped to leverage the full potential of Next.js in their web development projects.
Getting Started with Next.js
What is Next.js?
Next.js is a powerful React framework that has revolutionized web development. It provides developers with a comprehensive set of tools and features to build high-quality web applications efficiently. Next.js leverages the power of React components while offering additional capabilities that streamline the development process.

At its core, Next.js is designed to create fast, search engine optimized React applications with minimal configuration. It addresses many of the challenges developers face when building complex web applications, such as server-side rendering, routing, and code splitting.
Advantages of using Next.js
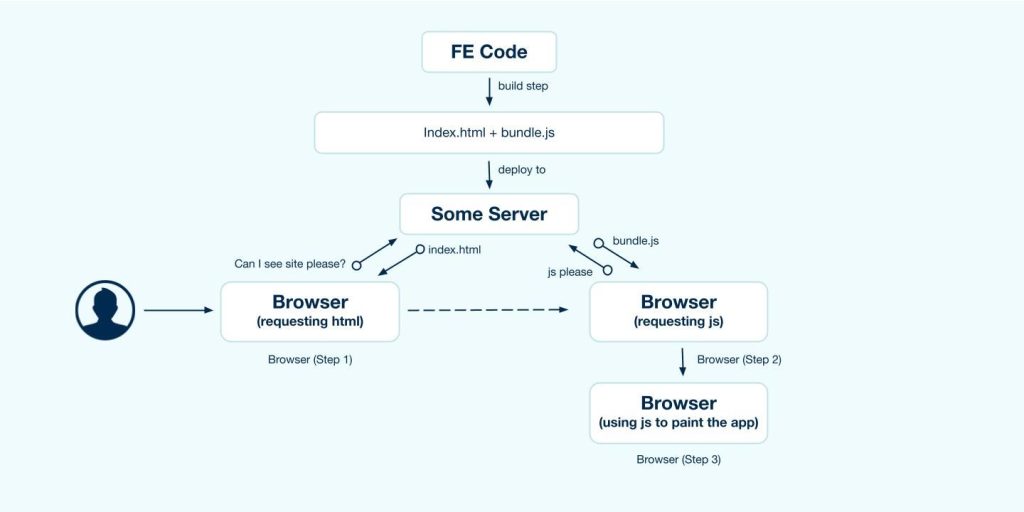
One of the key benefits of Next.js is its ability to improve performance. The framework supports various rendering strategies, including server-side rendering (SSR) and static site generation (SSG). These approaches help to reduce initial page load times, resulting in a smoother user experience, especially for those with slower internet connections or on mobile devices.
Next.js also enhances search engine optimization (SEO) through its rendering capabilities. By generating HTML on the server, it ensures that search engines can easily crawl and index the content, leading to better search engine rankings. This is particularly beneficial for businesses that rely on organic traffic to drive their online presence.
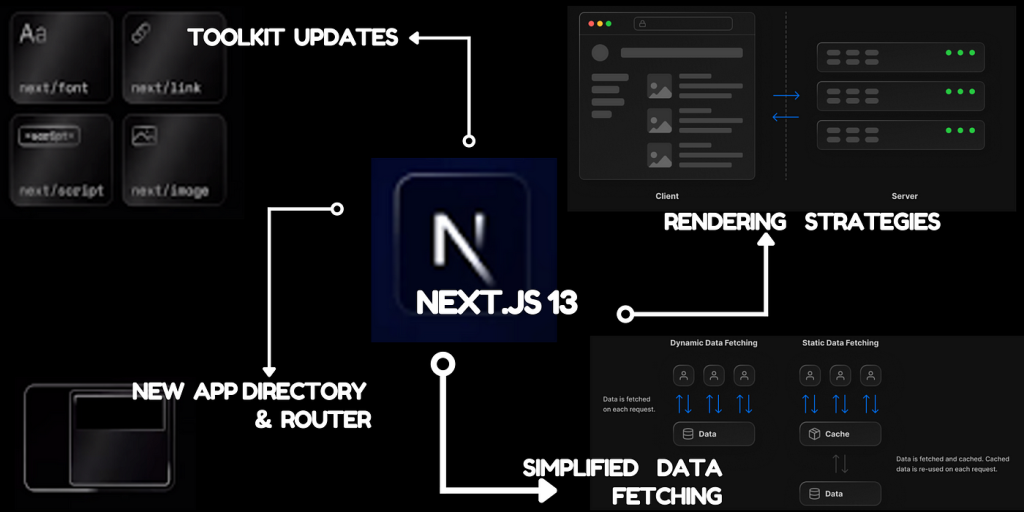
Another advantage is the framework’s built-in routing system. Next.js uses file-system routing, which means developers can create routes simply by organizing files in the project’s directory structure. This eliminates the need for complex route configurations and simplifies the development process.
Next.js also offers automatic code splitting, a feature that breaks down large JavaScript code into smaller, more manageable components. This approach ensures that only the necessary code is loaded for each page, resulting in faster load times and improved overall performance.
The framework’s ecosystem compatibility is another significant advantage. Next.js integrates seamlessly with the React and Node.js ecosystems, allowing developers to leverage their existing knowledge while taking advantage of Next.js features. This compatibility extends to various libraries and technologies, such as GraphQL for data fetching and Redux for state management.
System requirements
To get started with Next.js, developers need to ensure their system meets certain requirements. The primary prerequisite is having Node.js installed on the machine. Specifically, Next.js requires Node.js version 18.17.0 or higher. This version requirement ensures compatibility with the latest features and optimizations offered by Next.js.

In terms of operating systems, Next.js supports a wide range, including macOS, Windows (including Windows Subsystem for Linux), and various Linux distributions. This flexibility allows developers to work with Next.js on their preferred development environment.
For the development process, it’s recommended to use a code editor such as Visual Studio Code (VSCode) or any other preferred text editor. While not strictly necessary, using a modern code editor can greatly enhance the development experience with features like syntax highlighting and code completion.
By meeting these system requirements, developers can create a Next app and start building robust web applications using the powerful features and optimizations provided by the Next.js framework.
Setting Up Your Next.js Project
Installing Node.js and npm
To create a Next.js app, developers need to have Node.js installed on their system. Node.js is an open-source JavaScript runtime environment that allows execution of JavaScript code outside a web browser. It comes with npm (Node Package Manager), which is used to install and manage project dependencies.

To check if Node.js is already installed, open a terminal or command prompt and type node -v. If it returns a version number, Node.js is installed. If not, visit the official Node.js website and follow the installation instructions. Next.js requires Node.js version 18.17.0 or higher to ensure compatibility with its latest features and optimizations.
Creating a new project with create-next-app
The easiest way to set up a new Next.js project is by using the create-next-app command line tool. This tool automatically installs all necessary dependencies and sets up boilerplate code, allowing developers to start coding right away.
To use create-next-app, open a terminal and run the following command:
npx create-next-app@latest
During the installation process, you’ll be prompted with several questions about your project setup. These include:
- Project name
- TypeScript usage
- ESLint configuration
- Tailwind CSS integration
- src/ directory usage
- App Router implementation
- Import alias customization
After answering these prompts, create-next-app will create a folder with your project name and install the required dependencies.
Understanding the project structure
Next.js uses a file-system based routing approach, which means the structure of your project’s folders and files determines the routes in your application. Here’s an overview of the key directories and files in a typical Next.js project:
- app/ directory: This is where you’ll find the main application code. It contains:
- layout.tsx: Defines the root layout of your application.
- page.tsx: Represents the home page of your application.
- public/ directory: This folder stores static assets like images, fonts, and other files that can be accessed directly from the base URL of your application.
- components/ directory: While not created by default, it’s a common practice to store reusable UI components in this folder.
- styles/ directory: This is where you can keep your CSS files, including global styles and component-specific styles.
- lib/ or utils/ directory: These folders are often used to store utility functions, helper classes, or modules used across the application.
- package.json: This file contains metadata about the project and lists its dependencies.
- next.config.js: This is the configuration file for Next.js, where you can customize various settings for your project.
Understanding this structure is crucial for efficiently organizing your Next.js project and taking full advantage of the framework’s features. As your project grows, you may add more directories like services/ for API calls or hooks/ for custom React hooks to keep your code organized and maintainable.
Building Your First Next.js Page
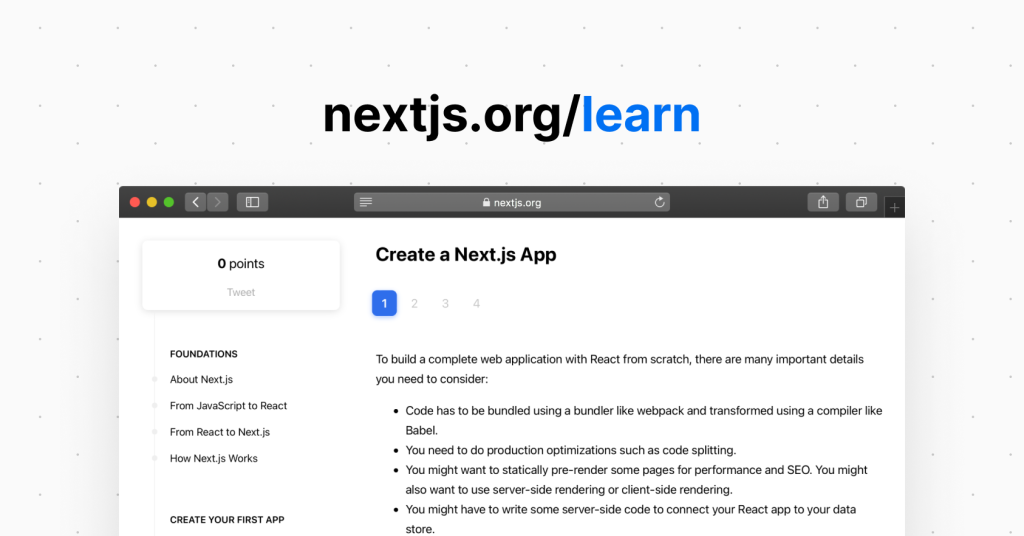
Creating a new page
To create a new page in a Next.js app, developers need to understand the file-system-based routing approach. Next.js treats every file with the extensions .js, .jsx, .ts, or .tsx under the pages directory as a route. This means that creating a new page is as simple as adding a new file to the pages folder.
For instance, to create an “about” page, developers can add a file named about.js in the pages folder. Inside this file, they should create a functional component and export it using export default. This component will then be accessible at the /about route in the browser.
Using built-in components
Next.js provides several built-in components to enhance the development process. One of the most important is the Link component from next/link. This component enables client-side transitions between routes, making navigation smoother and faster.
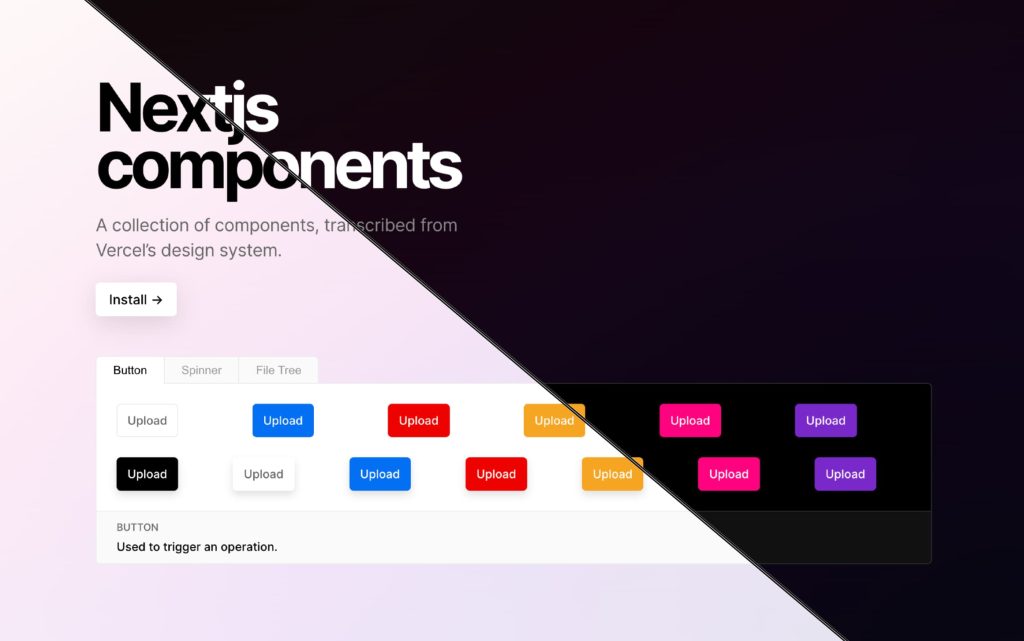
To use the Link component, developers can import it and wrap their anchor tags with it:
import Link from 'next/link'

export default function Navigation() {
  return (
    <Link href="/dashboard">
      <a>Dashboard</a>
    </Link>
  )
}
The Link component only requires the href attribute, which specifies the destination route.
Implementing basic routing
Next.js makes implementing basic routing straightforward. The framework automatically creates routes based on the file structure in the pages directory. For example:
pages/index.jsbecomes the home page (/)pages/contact.jsbecomes the contact page (/contact)pages/my-folder/index.jsbecomes accessible at /my-folderpages/my-folder/about.jsbecomes accessible at /my-folder/about
This intuitive system allows developers to create a logical route structure without additional configuration.
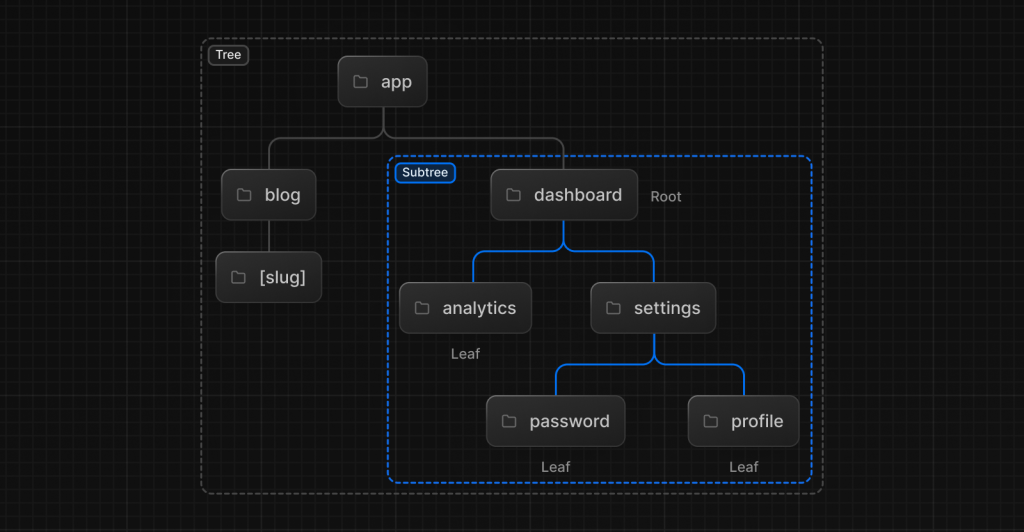
For more advanced routing needs, Next.js supports dynamic routes. These are created using bracket notation in the file name. For instance, a file named [id].js in the pages folder would create a dynamic route that can accept different IDs.
To access the route parameters in a dynamic route, developers can use the useRouter hook provided by Next.js. This hook gives access to the router object, which contains information about the current route, including any parameters passed.
import { useRouter } from 'next/router'

export default function Post() {
  const router = useRouter()
  const { id } = router.query

  return <p>Post: {id}</p>
}
This setup allows for flexible and powerful routing capabilities, enabling developers to create complex applications with ease.
By leveraging these features, developers can quickly set up the structure of their Next.js application and start building robust, scalable web solutions.
Styling Your Next.js Application
Next.js offers various approaches to styling applications, providing flexibility and options to suit different preferences and project requirements. This section explores three popular methods: CSS Modules, global styles, and Tailwind CSS integration.
Using CSS Modules
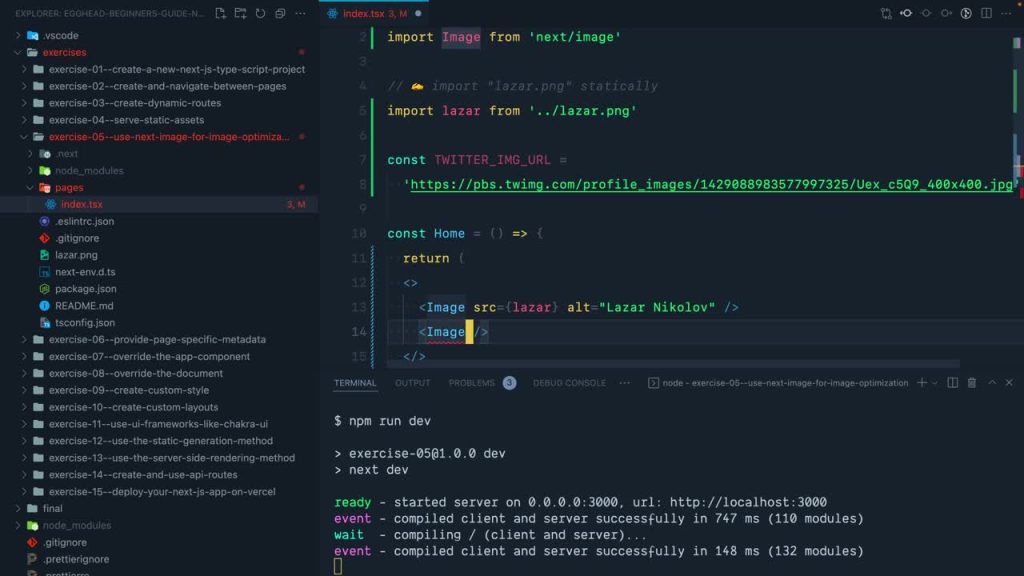
CSS Modules provide a convenient way to locally scope CSS styles to individual components in a Next.js application. This approach helps prevent style conflicts and enhances code maintainability. To use CSS Modules, create a CSS file with the .module.css extension, such as styles.module.css. Inside this file, define your styles as you normally would:
.title {
  color: blue;
  font-size: 24px;
}

.subtitle {
  color: gray;
  font-size: 16px;
}
To use these styles in your component, import the CSS Module and apply the generated class names:
import styles from './styles.module.css';

const MyComponent = () => (
  <div>
    <h1 className={styles.title}>Hello, World!</h1>
    <p className={styles.subtitle}>This is a subtitle.</p>
  </div>
);

export default MyComponent;
CSS Modules also support dynamic class names, which can be useful for conditional styling:
import styles from './styles.module.css';

const MyComponent = ({ isError }) => (
  <div className={isError ? styles.error : styles.success}>
    Hello, World!
  </div>
);

export default MyComponent;
Implementing global styles
While CSS Modules are great for component-level styles, sometimes you need styles that apply to every page in your Next.js application. To implement global styles, create a file called pages/_app.js with the following content:
export default function App({ Component, pageProps }) {
  return <Component {...pageProps} />;
}
This component wraps all the pages in your application and can be used to add global styles. To include global CSS, create a file (e.g., styles/global.css) and import it in pages/_app.js:
import '../styles/global.css';

export default function App({ Component, pageProps }) {
  return <Component {...pageProps} />;
}
It’s important to note that global CSS can only be imported in pages/_app.js. This restriction ensures that global styles don’t unintentionally affect other elements on the page.
Integrating Tailwind CSS
Tailwind CSS is a utility-first CSS framework that offers a unique approach to building modern and responsive user interfaces. To integrate Tailwind CSS with your Next.js application, follow these steps:
- Install Tailwind CSS and its peer dependencies:
npm install -D tailwindcss postcss autoprefixer
- Generate the configuration files:
npx tailwindcss init -p
- Configure the
purgeoption intailwind.config.jsto remove unused styles in production:
module.exports = {
  purge: ['./pages/**/*.{js,ts,jsx,tsx}', './components/**/*.{js,ts,jsx,tsx}'],
  // ... other configurations
}
- Add Tailwind directives to your CSS file (e.g.,
styles/globals.css):
@tailwind base;
@tailwind components;
@tailwind utilities;
- Import the CSS file in
pages/_app.js:
import '../styles/globals.css';

function MyApp({ Component, pageProps }) {
  return <Component {...pageProps} />;
}

export default MyApp;
Now you can use Tailwind’s utility classes in your Next.js components to rapidly build beautiful and responsive UI elements.
By leveraging these styling approaches, you can create visually appealing and well-structured Next.js applications while maintaining code organization and performance.
Working with Data in Next.js
Next.js offers developers powerful options to handle data fetching and rendering in their applications. Two primary approaches are Static Generation and Server-side Rendering, each with its own use cases and benefits.

Static Generation vs Server-side Rendering
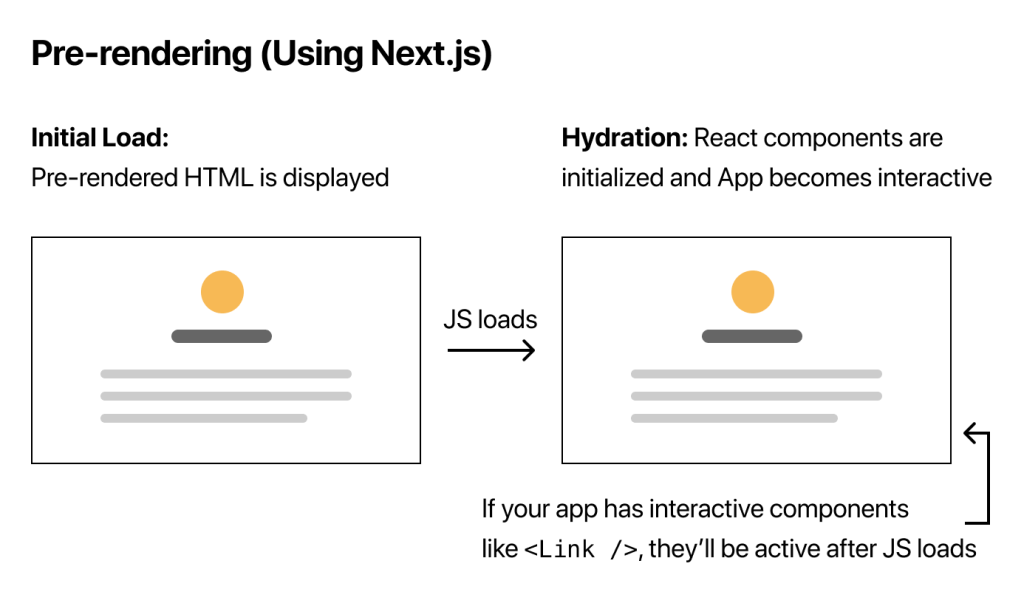
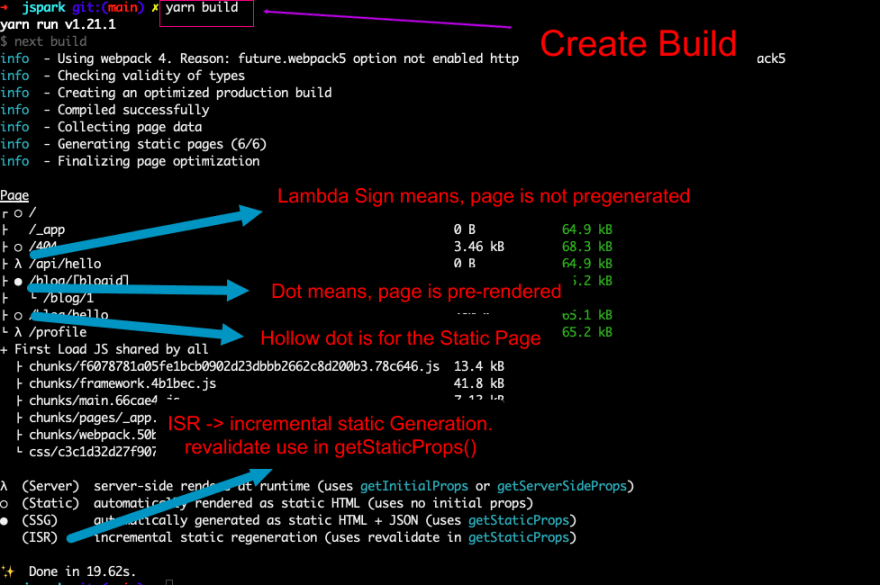
Static Generation (SSG) pre-renders pages at build time, creating static HTML files that can be served quickly to users. This method is ideal for content that doesn’t change frequently, such as blog posts or product pages. SSG enhances performance by allowing content delivery networks (CDNs) to cache and serve pages globally, resulting in faster load times and improved SEO.
On the other hand, Server-side Rendering (SSR) generates HTML on each request, ensuring that the content is always up-to-date. This approach is suitable for pages with dynamic data that changes frequently or requires real-time updates. SSR is particularly useful for applications that need to display personalized content or rely on user-specific information.
Implementing getStaticProps
To implement Static Generation in Next.js, developers can use the getStaticProps function. This function runs at build time and allows you to fetch data from external sources, such as a CMS or database, and pass it as props to your page components.
Here’s an example of how to use getStaticProps:
export async function getStaticProps() {
  const res = await fetch('https://api.example.com/posts')
  const posts = await res.json()

  return {
    props: {
      posts,
    },
    [revalidate: 60](https://nextjs.org/learn-pages-router/basics/create-nextjs-app/setup), // Optional: Enable Incremental Static Regeneration
  }
}
In this example, getStaticProps fetches a list of posts from an API and passes them as props to the page component. The revalidate option enables Incremental Static Regeneration, allowing Next.js to update the page’s content periodically without rebuilding the entire site.
Using getServerSideProps
For Server-side Rendering, Next.js provides the getServerSideProps function. This function runs on every request, allowing you to fetch fresh data and render the page dynamically. It’s particularly useful for pages that require real-time data or user-specific content.
Here’s an example of how to use getServerSideProps:
export async function getServerSideProps(context) {
  const { params, req, res } = context
  const userData = await fetchUserData(params.id)

  return {
    props: {
      userData,
    }
  }
}
In this example, getServerSideProps fetches user data based on the request parameters and passes it as props to the page component. This ensures that the page always displays the most up-to-date information.
By leveraging these data fetching methods, developers can create robust Next.js applications that balance performance and real-time data needs. Whether you’re building a static blog or a dynamic e-commerce platform, Next.js provides the tools to handle data efficiently and create engaging user experiences.
Deploying Your Next.js Application

Preparing for production
Before deploying a Next.js application, it’s crucial to optimize it for production. This involves leveraging built-in features that enhance performance and user experience. One key aspect is image optimization using the next/image component, which automatically optimizes images for faster loading times. Similarly, font optimization with next/font removes external network requests, improving privacy and performance. Script optimization through next/script ensures JavaScript scripts load efficiently across multiple pages.
Caching plays a vital role in improving response times and reducing server load. Next.js automatically adds caching headers to static assets stored in the /public folder. For instance, images, stylesheets, and other resources are cached with a Cache-Control header set to public, max-age=31536000, immutable. This approach significantly reduces the number of requests required to render a page, leading to faster load times.
Another important consideration is the implementation of custom error pages. Next.js supports custom 500 pages for server errors and static 404 pages for not found errors. These pages enhance the user experience by providing informative and branded error messages instead of generic system errors.
Deploying to Vercel
Vercel, the platform created by the Next.js team, offers a seamless deployment experience for Next.js applications. It provides a zero-configuration deployment process, making it an excellent choice for developers looking to get their apps up and running quickly.
To deploy to Vercel, developers can use the Vercel CLI or connect their Git repository for automatic deployments. The platform offers several benefits, including:
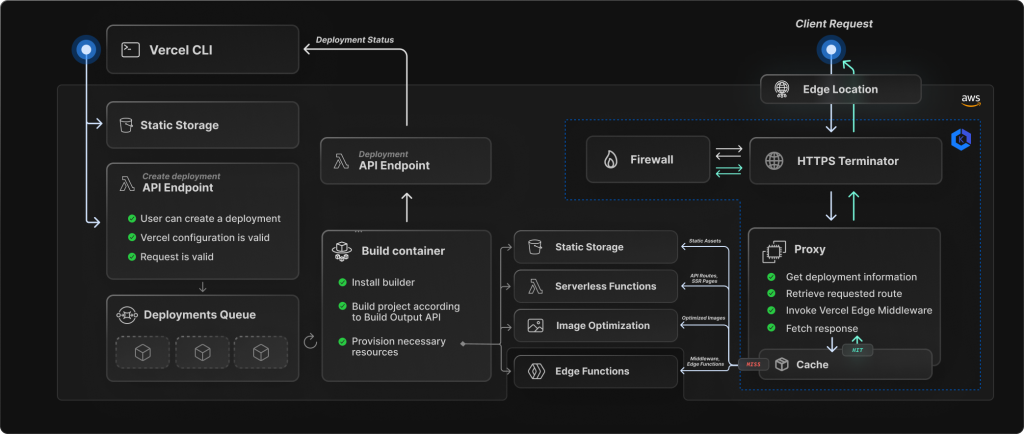
- Global Content Delivery Network (CDN) support
- Automatic SSL certificate provisioning
- Seamless integration with Next.js features like API routes and serverless functions
- Built-in performance monitoring through Next.js Speed Insights
Vercel also supports preview deployments for pull requests, allowing teams to review changes before merging them into the main branch. This feature enhances collaboration and helps catch potential issues early in the development process.
Alternative deployment options
While Vercel is a popular choice, there are several other deployment options available for Next.js applications. These alternatives cater to different needs and preferences:
- Netlify: Similar to Vercel, Netlify offers easy deployment with support for serverless functions and form handling. It provides a robust CDN and continuous deployment features.
- AWS Amplify: This platform combines serverless functions with static web app hosting, making it suitable for complex Next.js applications.
- Google Cloud Functions and Firebase Hosting: This combination allows developers to leverage Google’s infrastructure for serverless functions and CDN capabilities.
- Traditional server deployment: For those who prefer more control, Next.js can be deployed to any hosting provider that supports Node.js. This method requires running the
buildscript to generate production files and then using thestartscript to run the Node.js server. - Containerization: Developers can package Next.js applications into containers using Docker, allowing for consistent deployment across various environments. This approach is particularly useful for microservices architectures and hybrid cloud deployments.
When choosing a deployment strategy, it’s essential to consider factors such as scalability, performance requirements, and the specific features of your Next.js application. Each option has its strengths, and the best choice depends on your project’s unique needs and your team’s expertise.
Conclusion
The journey to create a Next.js app is an exciting venture into modern web development. This guide has walked you through the essential steps, from setting up your project to deploying your finished application. By leveraging Next.js’s powerful features like server-side rendering, static site generation, and built-in routing, developers can build fast, SEO-friendly web applications with ease. The framework’s flexibility in styling options and data handling approaches adds to its appeal, making it a top choice for projects of all sizes.

As you continue to explore Next.js, remember that practice is key to mastering its capabilities. The ecosystem around Next.js is constantly evolving, bringing new tools and best practices to enhance your development experience. Whether you’re building a simple blog or a complex e-commerce platform, Next.js provides the foundation to create robust, scalable web solutions. So, dive in, experiment with different features, and let your creativity shine as you build amazing web applications with Next.js.
FAQs
How can I use Yarn to create a Next.js application?
To create a Next.js app with Yarn, follow these steps:
- Run the command:
$ npx create-next-app-ts your-app-nameto create a new Next.js project. - Verify the installation by running:
$ yarn. - Start the development server with:
$ yarn dev. - Build your application for production using:
$ yarn build. - Export your static files with:
$ yarn export. - Fix lint errors, if any, by running:
$ yarn lint:fix.
What are the steps to set up a Next.js project using TypeScript?
To initiate a Next.js project with TypeScript, you should:
- Install Node Package Manager (NPM) if you haven’t already.
- Use the command:
npx create-next-app --typescriptornpx create-next-app --tsto start a new project with TypeScript configuration.
How can I enhance the speed of my Next.js application?
To optimize the performance of your Next.js app, consider these strategies:
- Utilize Next.js’s built-in optimization features to automatically enhance your app’s speed.
- Remove any unused packages from your project to lighten the load.
- Regularly check and manage the size of your application bundle.
- Use tools like Lighthouse to analyze and improve performance.
- Implement dynamic imports to load components only when needed.


